


Being a creative photographer is not out of your reach, all you need to know are a few simple photography tricks. The “Rule of Thirds” is a CRUCIAL part of doing creative photography. Knowing this will help you with mood, framing, and story-telling. Here are a few things you need to know about the rule of thirds to help you out! For this article, I’ll be using a single set I did for it’s many examples (SACFW2016). I tend to get more creative with documentary/event style photography.
The Rule of Thirds:
Basically, it’s dividing the frame into vertical or horizontal thirds. Some even look at a frame in nine sections (3×3) for a more dynamic shot. It’s breaking the image down to a grid-like state and deciding where you want to place the subject. You can use ANY part of the frame to place your subject. All you need to do is decide how much background you want, what part of the background you need (to tell the story), and where your subject should be. Here are a few examples from my behind-the-scenes shots of Sacramento Fashion Week 2016.
Mid-Frame:
Having the subject dead-center of the frame. However, tilting the camera slightly rather than just shooting straight on (as you see here) can make the photograph more interesting. You don’t always have to have the subject take up the ENTIRE frame (as seen here).
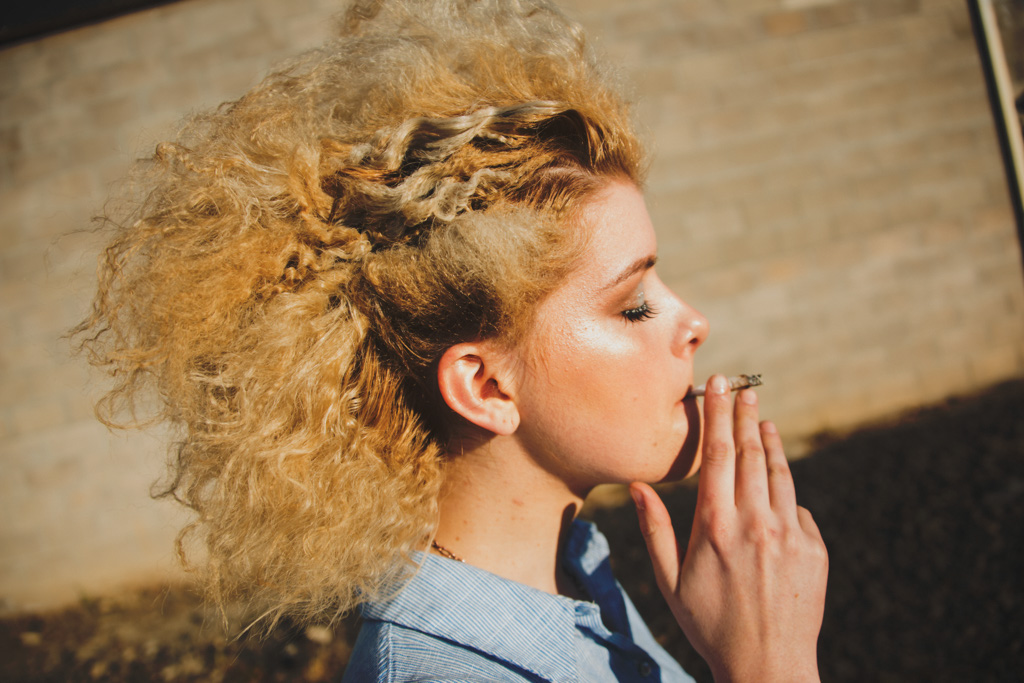
*For a creative mid-frame photograph you should also use “leading lines”. In this example the shadow and the trailer lead the eyes straight back to the subject of the photo*
Half N’ Half:
Splitting the image right down the middle is another tactic one could use to frame the subject(s) of a photograph. In this shot, I used a pole to literally split the image in two. The contrast between the two sides is what drew me to that frame up.
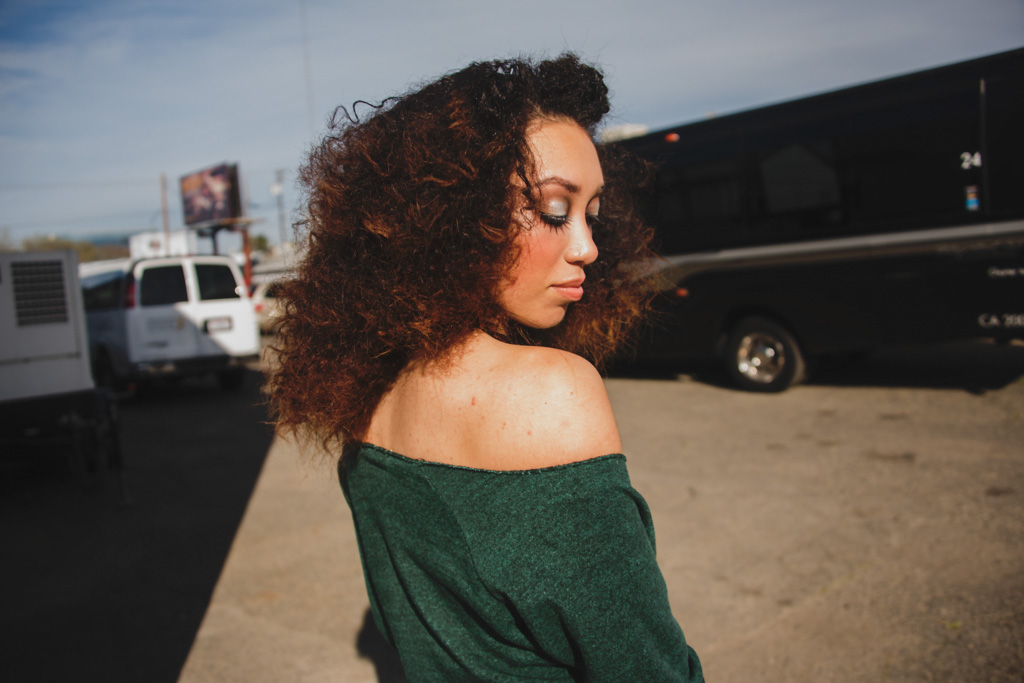
Another example is this model I captured backstage with her taking up half of the frame with nothing else interesting on the other side. This is a more common way of doing the half-frame shot. Again, I like to shoot at a tilt, but you don’t have to.
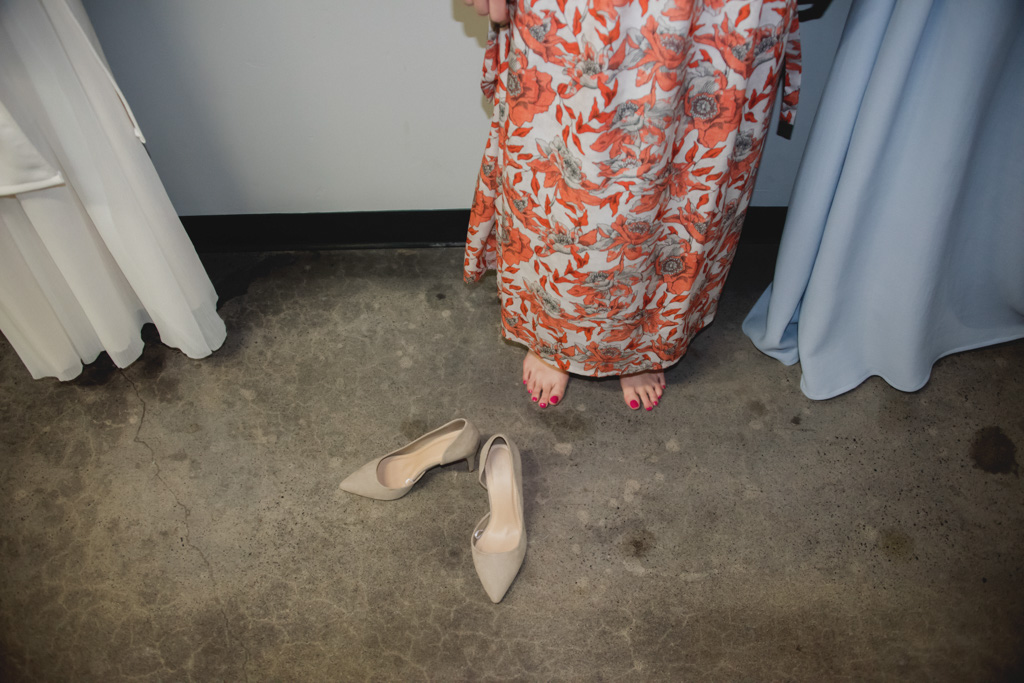
Horizontal Split:
Not usually done, but when done right, it looks pretty rad. In this example I used three models to frame the top half of the photo. For the bottom half, I used the blank space and the shoes to balance it out. I did want to move the shoes over more towards the blank spot in between the dresses, but this was a behind-the-scenes shoot. If it were a photo shoot, I would have. I tend to NOT touch anything, or pose anything when it’s an event, BTS, or a documentary style shoot.
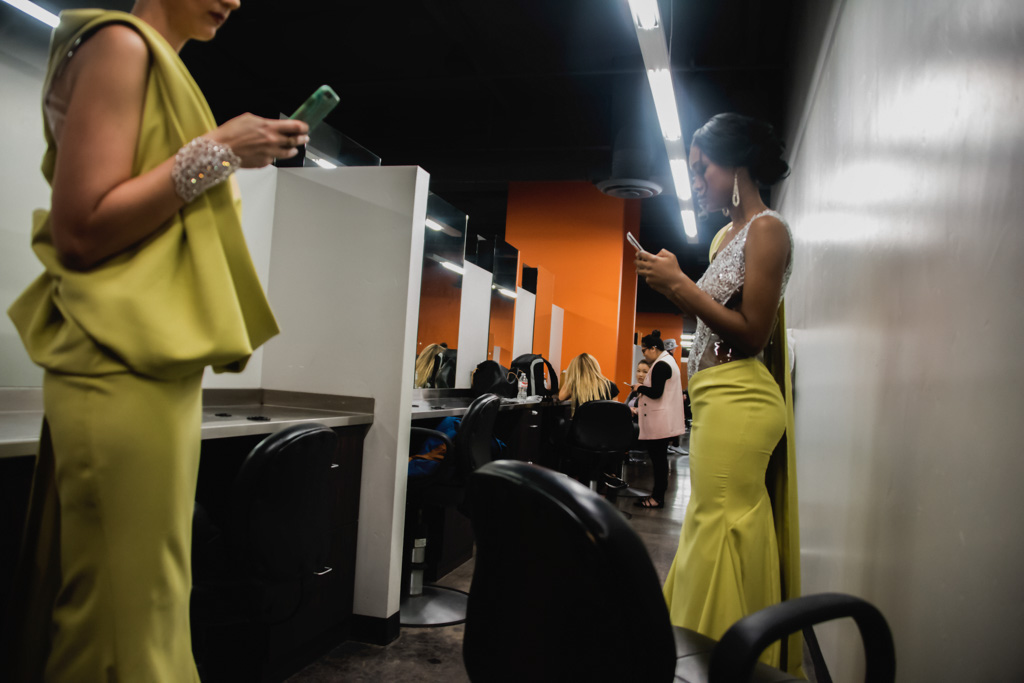
Splitting Into Fourths (Complicated Halves):
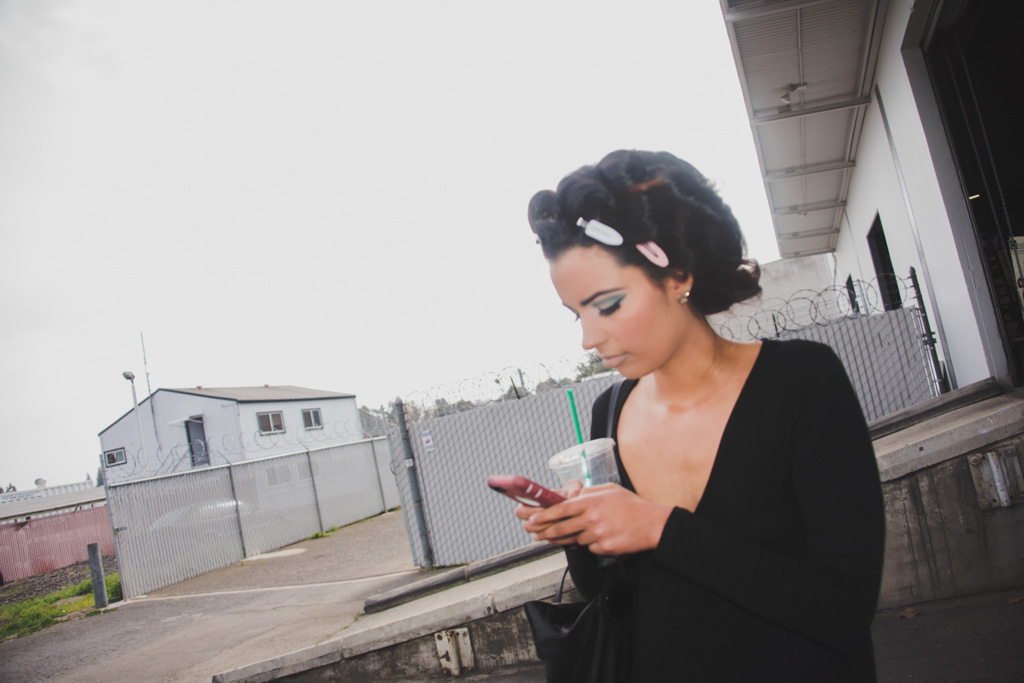
This one is a little trickier, but can be learned with practice. For this example I’m using a photo I took of two differently placed models on their phones. If you can, split the photo in half in your mind. Notice that the first model is holding up the far left side of the frame. Next to her, a blank space and another model, followed by another blank space. I did this “model, blank, model, blank” frame up on the spot without even thinking about it too much (this is the level you want to get to). Recognizing a perfect frame-up, and taking the shot without hesitation (it will only last a moment).
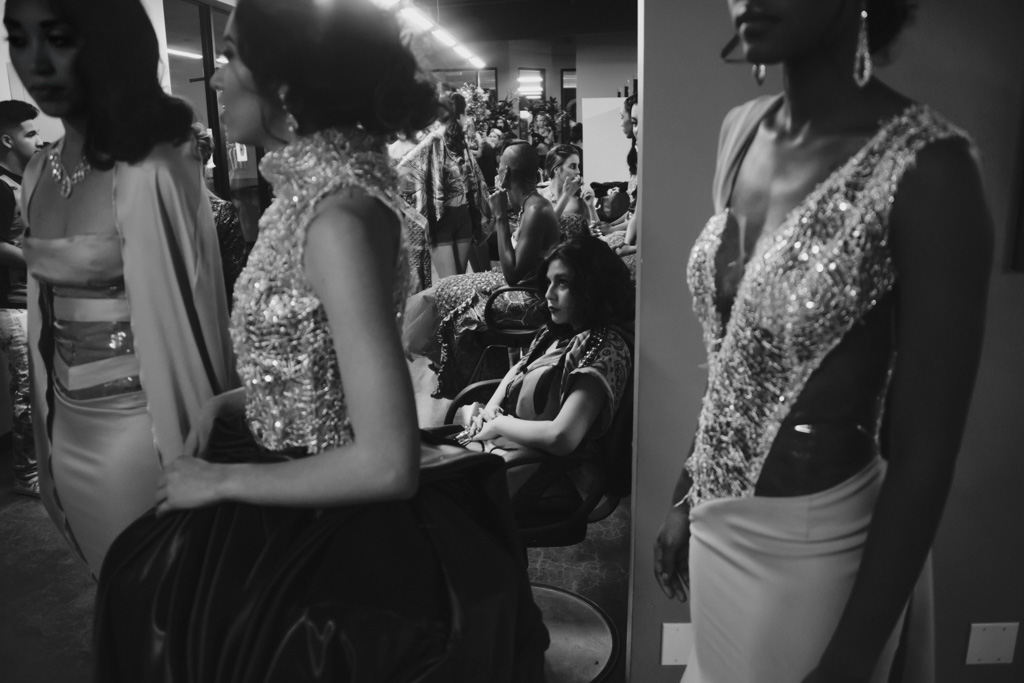
Actual Thirds:
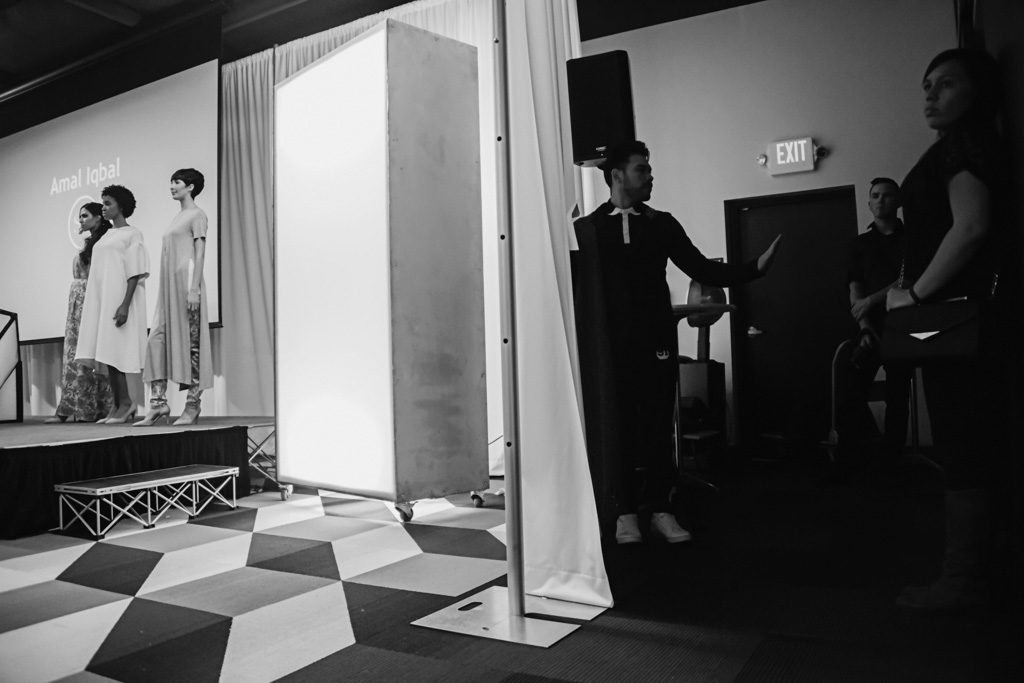
Shooting in actual thirds is another example of using your frame for creative photography. For this example, I photographed a models waiting to walk the runway. One sitting in the middle, and three other framing her on either side. Using a low aperture (4.5f) made the photo more dramatic and eye catching. The framing of the main subject by using the surroundings is a great way to shoot in thirds.
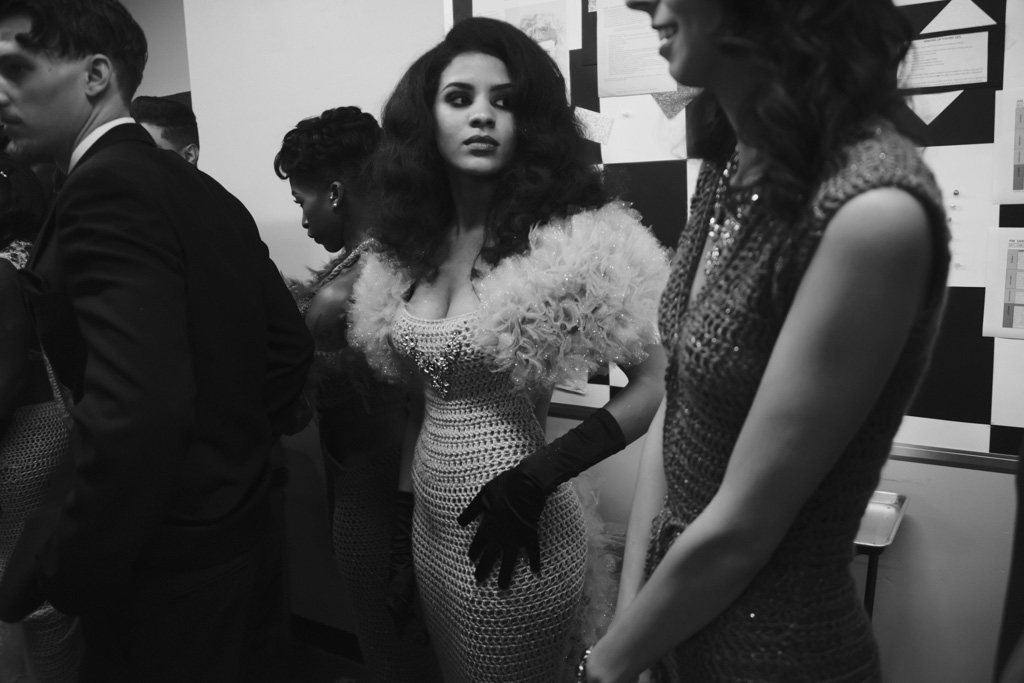
A second example is this photograph. Again, using the surroundings to frame up the main subject is key for shooting in thirds. However, you do not have to have the subject in the MIDDLE of the frame. You can frame anyone, anywhere in the photograph.
Last Minute Blips:
Remember that the rule of thirds is to help you frame the subject, and make your photograph more intriguing. You don’t have to follow conventional frame-ups; you can frame the subject where ever you wish. When shooting, play with the framing during the first few test shots. If there’s something in the background that you want in the photo, move around the model and frame them in a different way. Always pay attention to empty spaces, they are just as important as the rest of the photo. Looking for opposites is another key factor in framing up the photo. Keep practicing out in the world with your camera and take a look at what you’ve shot. If you start to see it as a puzzle, you’re getting somewhere, because that’s basically what it is. A grid, that showcases the subject, and in a way challenges the viewer to look at it a little more closely.
Happy shooting! If you have any questions about this post contact me any time!
